|
If you can remember back to this spring, you'll recall we had some very cold, icy weather well into April. That late blast of winter pushed the spring bloom back a couple weeks for a lot of plants, including for our magnolia tree.
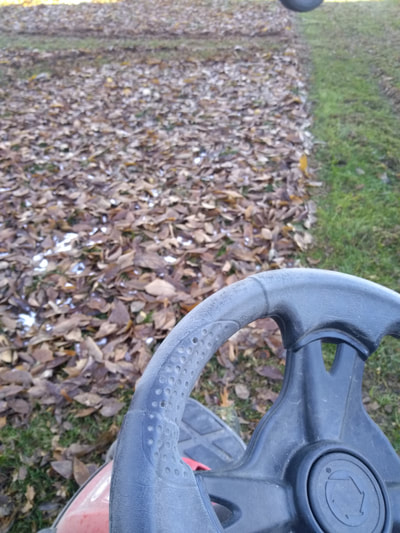
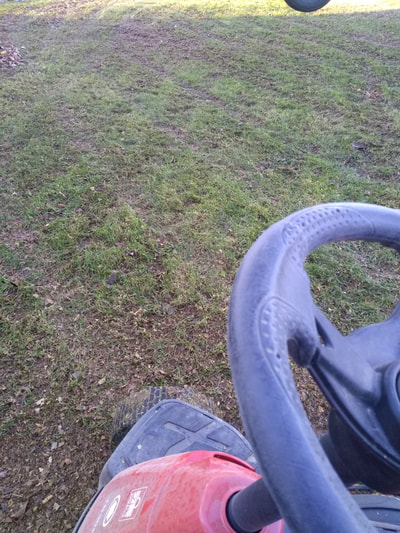
It seems that magnolia wanted to get all it could out of this season since it got such a late start on things, because it also decided to drop its leaves late this year too. Today I was finally able to take care of those leaves. And it was a great day for my lawn. I always tell anyone who will listen that they should mulch mow their lawn, all season long. That means, from the first mow of spring through the final leafy mow of the fall, take that bag off your mower and let those clippings stay on your lawn. Making sure you mulch those leaves in the fall (instead of raking them up) is especially important, because they do so much for your turf. First, those mulched leaves provide a home for critters-- both the macrobial and microbial populations in your yard. They allow beneficial bugs and fungi and bacteria and other critters to overwinter more effectively. A healthy turf relies on those living things, so we should be doing everything we can to make sure they're taken care of on our lawns. Second, those mulched leaves are nature's fertilizer. They break down and release nutrients into the soil which your lawn needs for growth. Then as they break down, they turn into compost for your soil. Soil with a healthy level of compost (organic matter) holds both water and nutrients more effectively, which helps your lawn stay healthy all year long (even in the blazing hot summer and frigid winter). Finally, those mulched leaves serve as insulation for your turf over the winter. Think of that thin layer of chopped up leaves as a blanket for your yard, which means your grass won't suffer as much through the harsh west Michigan winter. In some cases, you may have to run your mower over those leaves two or three times to get the particles small enough for you to be comfortable with. But the extra bit of mowing will be worth it in the spring. In some parts of our yard, I don't even bother to mulch the leaves. I just let them overwinter at full-size, and then in the spring I mulch them up for an early-season lawn feeding. If you've got a smaller yard, or neighbors who might cast judgement upon you, I don't recommend just leaving the leaves, however. Mulch 'em. But if you've got areas of your yard where you just don't care about a little unsightly leaf cover, I say let them go until April. They'll do what nature intended: Cover and feed the soil. (One word of warning: If you've got a really thick leaf cover on your lawn, or you've got big heavy leaves, like from a magnolia tree, you're gonna want to do at least one pass with the mower, otherwise the blanket will be too thick, and may smother your grass or encourage mold.)
0 Comments
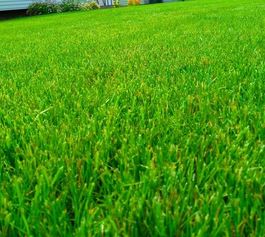 Since autumn is just around the corner, that means your lawn’s growing season is just around the corner as well. You may have noticed your grass slows down during the summer months—it doesn’t grow as fast, which means less mowing, and it often takes on a brownish hue, some might even call it “crispy.” This, of course, is completely normal for Michigan lawns. The hot summer months are the dormant period for cool-weather grasses. But as the daytime temps dip into the 70s more regularly, and precipitation picks up, you can expect your lawn to start “growing and greening” again. With that, there are some things you can do to make your lawn healthier and thicker. 1. Fall is a great time to fertilize. Good Sweet Earth applies organic fertilizer (an alfalfa blend fertilizer) twice a year: in spring and fall. If you were going to only apply fertilizer one time a year, I recommend fall over spring. Why? A few reasons: First, fall fertilization gives your lawn some nutrients before the long, harsh winter. This will make it less distressed when spring rolls around. It also adds organic matter to your soil to help insulate the roots a bit. Second, if you’re applying slow-release organic fertilizer, it won’t break down entirely before winter sets in, which means there will likely be some semi-composted product still on your lawn in the spring; it’s sort of an early spring meal for your lawn which will help green it up early and get it growing strong. Finally, there are less weeds germinating in the fall, which means the nutrients you put in your soil will be more available for your grass, instead of those nasty invasive plants you’d rather not be fertilizing. If you're interested in having us apply some alfalfa blend fertilizer to your lawn, get in touch. 2. Fall is the ideal time to overseed. Like fertilizing, you can overseed in either spring or fall. I prefer late summer/early fall because your grass seeds won’t be competing for space with weed seeds as much. Those gaps in your lawn where grass isn’t growing are prime real estate for weeds. But as your soil gets healthier from organic lawn treatments, those gaps will fill in with grass—unless weeds get there first! In the fall, there are less weed seeds looking for a home, so putting grass seed down in late-August or earl-September (you could do it as late as the first part of October, especially if we have a warm fall) will ensure the grass has a head start over the weeds come spring. To overseed, first, mow your grass lower than you normally would; if the clippings are especially long or clumpy, rake them up so the seed can fall easily to the soil below. Second, buy a sun/shade mix and apply it with a spreader or scatter it evenly by hand. The rate you should be applying is typically 4-6 pounds per 1000 square feet (a 10,000 square foot turf space should be overseeded with about 50 pounds). For bare spots in your lawn: Mix the seed with a little potting soil (soil + compost) and apply it directly as a patch. If rain’s not in the forecast, water it regularly. Every year you do this will mean thicker and less weedy turf. 3. If you’re going to aerate your lawn, do it in fall. Summer is a bad time for aeration simply because you don’t want to distress your lawn any more than you have to during its dormancy. In fall, the grass is growing strong and can recover better from the aeration process. If you’re going to aerate, either hire a company to do core aeration (pulling plugs of soil out of the ground), or rent a core aeration machine and do it yourself. Do NOT succumb to the idea of putting spikes on your shoes and walking around your yard. That simply compacts the soil further. To properly aerate, you need to pull plugs out of the ground so that water and air can get in. Poking holes with spikes won’t do that. That being said, aeration is typically only necessary once every few years, and usually only with over-chemicaled yards. When soil is healthy, full of microbes, worms, bugs and organic matter, it doesn’t need core aeration—the worms and bugs and microbes aerate it for you.  Photo courtesy the Outdoor Discovery Center Photo courtesy the Outdoor Discovery Center We're excited to be part of the Fourth Annual Macatawa Water Festival this Saturday, July 14, at Windmill Island in Holland! The event goes from 9am-1pm, and is free to the public. We'll be joining over 30 other community organizations promoting a cleaner, healthier Macatawa Watershed. Activities will include kayaking, fishing and crafts! Meijer will be there providing fresh fruits and veggies from local farmers. Good Sweet Earth will be there (Steve & Corey) to talk about the importance of healthy soil and vermicomposting in relation to healthy watersheds, with a craft for the kiddos. The Macatawa Water Festival benefits Project Clarity. Windmill Island is located at 1 Lincoln Avenue in Holland. For more information, click here. 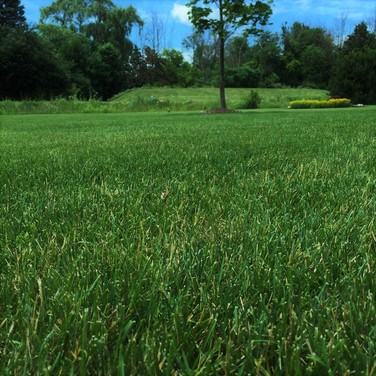 A couple weeks ago, I taught a class at Meijer Gardens in Grand Rapids on eco-friendly lawns. I have to say, preparing to teach a class on your life’s work really helps you organize your thoughts and mission. I came out of this experience with a clearer understanding of, not just how I approach organic lawn care, but why I do it the way I do. I’ve always thought of myself as a “lawn guy.” I’m certified in lawn care management through the University of Georgia, I’ve joined the National Association of Landcare Professionals (NALP), and I help people get their turf strong and healthy. That would fit most people’s definitions of “lawn guy.” But after doing this class at Meijer Gardens, I realized I’m not so much a “lawn guy” as I am a “soil guy.” But the two aren’t mutually exclusive. If you’re a lawn guy without also being a soil guy, you’re potentially doing long-term damage to the turf (not to mention the planet). If a lawn guy is simply interested in getting your lawn green and weed-free in a matter of days, with no concern for the health and fertility of the soil below, your lawn’s going to suffer. Applying synthetic chemical fertilizers and herbicides kill the soil, plain and simple. But as a lawn guy, who’s also primarily a soil guy, I’m more interested in creating healthy soil—full of microbes, worms, beetles, organic material, nutrients that don’t leach away—than I am in making your lawn instantly green and weed-free. Healthy soil will give you healthy turf. Dead soil will give you, well, dead turf. Now don’t get me wrong, I’m still interested in giving people a lawn that’s green and relatively “weed free,” but there’s no magic instantaneous potion that can do that while NOT killing the soil, and don’t let anyone tell you otherwise. And that’s why I am so passionate about feeding the soil, rather than the grass. That’s how nature’s been doing it for millennia. Soil damaged by synthetic chemicals will ultimately give you weak turf and “dead zones” where weeds pop up and grass just doesn’t grow… and then the chemical lawn guys will tell you how much you need them to get your lawn looking good again. And it’s true, in a twisted way—through chemicals, they’ve created a lawn that is wholly dependent upon more environmentally-damaging chemicals for its survival. But what your lawn really needs is healthy soil. Healthy soil will give you healthier, stronger turf. Healthier, stronger turf will push out those pesky plants we know as weeds. And that’s why my focus is to give our customers healthy soil—by feeding your soil with microbes, compost, natural fertilizers like alfalfa and kelp. So when I work on a lawn, I’m doing it as a “soil guy” first and foremost. And when you take care of the soil, your lawn is actually sustainable and healthy, not dependent and weak. If you'd like to have Good Sweet Earth give you a healthier lawn by improving your soil, get in touch with me at Steve@GoodSweetEarth.com or call us at 616-594-0693. 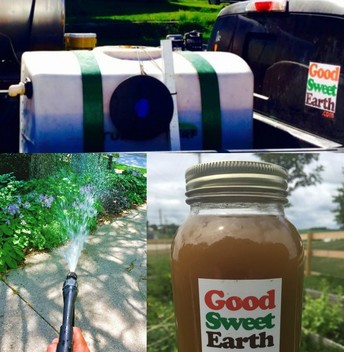 If you’re familiar with compost tea, our Worm Tea is similar, except instead of using traditional hot compost (or thermophilic compost), we use our own Living Worm Compost. Our Worm Tea is sold by the gallon to backyard gardeners for flowers, fruits, veggies, shrubbery and as a compost pile activator. It’s also used by farmers on their crops as a microbial drench and anti-fungal agent. Finally, we use it on lawns. Before we get into how we make our Worm Tea, let’s look at different types of microbial tea and the different methods of making it. Then we can get into how we do it, and why we do it that way. The basic recipe of compost tea consists of compost (the source of the beneficial microbes), a food source for the microbes (typically molasses) and water (distilled, rain or well water; using municipal water straight from the tap can kill the microbes because of added chemicals like chlorine). Other things can be added to give the finished product a more complex microbial population or nutrients. But those are the basics. For a simple recipe, just throw a pound or two of compost into the bottom of a five-gallon bucket, add a half cup of black strap molasses and fill the bucket with distilled water. Let it sit in the sun for a few days, and you’ll begin seeing some film, froth and bubbles. This is evidence of your microbial population growing. You could simply add this to your plants and soil. The problem with this method is it’s a little haphazard. First, it’s anaerobic, meaning there’s no added oxygen, so you can often end up with dangerous microbes. Second, traditional hot compost isn’t very uniform. It might not be completely “finished” (meaning it might contain pathogens or materials that aren’t necessarily beneficial), it could be too “finished” (meaning it lacks any sort of nutrients), and since different materials break down differently, every batch of hot compost is completely different from the next. To create a safer compost tea, you could consider adding oxygen by way of an aquarium or pond aerator. Simply use the ingredients from above, but then plunk some aeration stones attached to an aerator and let it bubble for a couple days. This will give you an aerobic (active in the presence of oxygen) tea. The problem you might face now is a product that doesn’t come out of a spray bottle cleanly. With your compost simply tossed into the bucket, you’re going to have chunks and slurry in the finished product. To fix this, use an old pair of panty hose. Or a burlap sack. So now comes the question: What’s the difference between tea made with traditional hot compost and tea made with vermicompost (like our Living Worm Compost)? Difference #1: Vermicompost is completely “finished.” You never have to worry about semi-composted chunks of matter (sometimes containing pathogens) getting into your tea. When a worm eats the organic material and poops it out, it’s done. It gives you a more uniform result because vermicompost itself is more uniform than hot compost. Difference #2: Unlike traditional hot compost, which often has all the nutrients leach out or get destroyed by the high temperatures, vermicompost still contains trace amounts of nutrients. That’s good for your plants. At the end of the day, tea—whether it’s made from hot compost or vermicompost—is meant to give your soil and plants a boost of microbes. Those microbes, both fungi and bacteria, help break down organic matter in your soil and serve as an anti-fungal agent. Without life in your soil, your plants will suffer. So now on to how we make our Good Sweet Earth Worm Tea: We use specially-made compost tea bags that we fill with our Living Worm Compost. We also add a special blend of alfalfa meal and kelp for added growth hormones and iron, respectively. To that we will add black-strap molasses. We add the water from our underground aquafer (fancy way of saying “our well”) and turn on the large pond bubbler. The whole thing is done inside our 100-gallon tank, which we can use to apply it directly to lawns, transfer into a farmer’s irrigation tank, or put into jugs and buckets for individual use. We let the tea brew for between 24 and 72 hours (earlier in the season, when temps are still cool, it takes longer to get the microbe population up to where it needs to be; in mid- to late-summer, the microbes multiply faster in the heat). Now when it comes to brewing our Worm Tea for use on lawns, we’ll at times add other ingredients based on the needs of a customer’s turf at any given time. Sometimes we’ll add more kelp extract, sometimes we’ll add another bit of alfalfa. If we want more a more fungal tea (not typical for lawns), we can add oats or spent distillers grains. If we want a more bacterial tea (good for lawns), fish emulsion or additional sugars (maple syrup, cane sugar, etc) can be added. For the tea that we sell at farmers markets and on our website, our recipe is pretty standard: Living Worm Compost, aquafer/rain water, kelp, molasses, alfalfa meal. This is the recipe that we’ve found gives the best results, and it keeps things consistent for everyone that uses it. And there it is. It sounds relatively simple, and at its core, it is. However, what we’ve been working on over the past several years is ingredient ratios, brew time and oxygen levels. And that’s where we feel like we’ve hit the sweet spot. If you’re interested in purchasing our tea (available only in West Michigan), check out our product page. Be aware: Since it does contain living organisms, you will need to use it within 8 hours of getting it. |

