Good Sweet Earth

  • About
    • About us/ FAQ
    • blog
    • See the results
    • Associations & certifications
    • Giving Back
  • Lawn Fertilization
  • Garden Pro Service
  • Contact: 616-594-0693
  • Good Sweet Earth Grassroots
  • About
    • About us/ FAQ
    • blog
    • See the results
    • Associations & certifications
    • Giving Back
  • Lawn Fertilization
  • Garden Pro Service
  • Contact: 616-594-0693
  • Good Sweet Earth Grassroots

Yard & Garden Blog

Getting tulips right

3/28/2017

0 Comments

 
Picture
In West Michigan this time of year, especially in the Holland area, it's hard to avoid the hype around the tulip-- and for good reason. These bulbous members of the lily family are an annual reminder that spring has sprung; they thrive in areas with dry summers and cold winters, so West Michigan is a great place to enjoy them.

If you're interested in growing tulips, or even if you've had them in your yard for years, we've got some tips for getting the most from these beautiful perennials.

For planting:

  • Nature never intended for bulbs to hang out above-ground, so plant them the same year you get them.
  • Plant tulip bulbs in the fall, six to eight weeks before a hard frost is expected and when soils are below 60 degrees F. In West Michigan, this means October to early November.
  • Tulips dislike excessive moisture. Ideally, the soil is well-drained, neutral to slightly acidic, fertile, and dry or sandy.
  • Rainy summers, irrigation systems, and wet soil are death to tulips. Never deliberately water a bulb bed. Wet soil will lead to fungus and disease and rot. Add sand to the soil when you plant to encourage quick drainage.
  • Space bulbs 4 to 6 inches apart, so choose an appropriate plot size.
  • To deter mice and moles—if they have been a problem—put holly or any other thorny leaves in the planting holes. Some gardeners use kitty litter or crushed gravel.
  • If ravenous rodents are a real problem, you may need to take stronger measures, such as planting bulbs in a cage of wire.
  • Plant bulbs deep—at least 8 inches, measuring from the base of the bulb. But when you're digging your bulb's hole, don't stop at 8 inches-- digging even deeper to loosen the soil and allow for drainage. Remember, the bigger the bulb, the deeper the hole it needs.
  • Set the bulb in the hole with the pointy end up. Cover with soil and press soil firmly.
  • Water bulbs right after planting. Bulbs need water to trigger growth. But then, lay off the water.
  • If you’re planning to raise perennial tulips, feed them when you plant them in the fall. Bulbs are their own complete storage system and contain all of the nutrients they need for one year.
Caring for your bulbs and tulips:
  • Water tulip bulbs only during dry spells in the fall; otherwise, do not water.
  • Add compost to the bulbs and flowers every year (fall & spring).
  • Deadhead tulips after flowering.
  • Allow the foliage to go yellow for about six weeks after flowering before cutting it down.
  • Replant the largest bulbs; smaller bulbs may be grown in containers in a bulb frame, in mix of equal parts loam, leaf mold, and sharp sand. 
Every fall the City of Holland plants over 300,000 tulip bulbs, which in the spring will welcome visitors to Tulip Time. Once the blooms are done, the city invites people to be part of their annual "Tulip Dig." You bring a shovel and buckets and help yourself. Keep an eye open at the City of Holland's website for more info later in the spring. 

Tulips don't last long, but they are a welcome flash of color after a cold gray winter. Follow these tips and yours will be the envy of the neighborhood for years to come.

​Source: Farmer's Almanac. Read more on raising tulips here.


0 Comments

The winter solstice has passed. Next stop: Spring!

12/22/2016

0 Comments

 
Picture
We officially hit the Winter Solstice at 5:44am yesterday. The Solstice fell on December 21 this year, but did you know that it can fall anywhere from December 21 through December 23. That means today is officially the first FULL day of winter. On the flip side (of the planet), today marks the first full day of summer.

But what exactly is the Winter Solstice? From the Old Farmer's Almanac:


Winter solstice is the day with the fewest hours of sunlight during the whole year...
​
​The word solstice comes from the Latin words for “sun” and “to stand still.” In the Northern Hemisphere, as summer advances to winter, the points on the horizon where the Sun rises and sets advance southward each day; the high point in the Sun’s daily path across the sky, which occurs at local noon, also moves southward each day.

At the winter solstice, the Sun’s path has reached its southernmost position. The next day, the path will advance northward. However, a few days before and after the winter solstice, the change is so slight that the Sun’s path seems to stay the same, or stand still. The Sun is directly overhead at “high-noon” on Winter Solstice at the latitude called the Tropic of Capricorn.

The next big event in our planet's rotation around the  sun will be the Spring Equinox-- March 20, 2017 at 6:29am. That's just 88 days, people! It's never too soon to start planning your garden for next season.
0 Comments

Healthy lawn tips from the Old Farmer's Almanac

6/5/2016

6 Comments

 
Picture
“Treat your soil well and your lawn will look amazing.

"Apply compost in the spring and fall.”

“Don’t worry if your lawn doesn’t look like the outfield at Comerica Park. Embrace a little clover.”

“Water less frequently, water deeper.”

Good Sweet Earth lawn customers have been hearing these things from us for years. And we’re always happy when we see this type of information appear in mainstream publications. Needless to say, when organic lawn care tips appeared in the Old Farmer’s Almanac, we were ecstatic; here's an excerpt:

The more you let nature do the work for you, the easier it will be to care for your lawn. 
​
​Always pay attention to the soil! Your lawn needs nourishment.
  • Every spring, apply a one-to-two-thick layer of compost to top of your lawn with a spreader. Soils rich in decomposed organic materials will do a better job of holding moisture.
  • In the spring, remove the thatch or dead grass with a rake to help moisture and oxygen reach down to the roots.
Fertilizing
  • As well as building your soil with compost, regularly apply a slow-release nitrogen fertilizer [like alfalfa meal] with a lawn spreader. The best time to apply fertilizer is just before it rains.
  • In areas of your lawn where tree roots compete with the grass, apply some extra fertilizer to benefit both.
Watering
  • Water your lawn early in the morning or in the evening.
  • Water long enough to allow the water to soak in below the root zone. Shallow watering encourages shallow root growth and weeds. It will take about an inch of water to penetrate 6 to 8 inches into the soil. Set out shallow cans in the sprinkler area to measure.
  • Don’t overwater. Make the lawn seek its own source of water, building longer, sturdier roots. Cut back on water especially in midsummer to let the lawn go dormant, strengthening it for fall and winter.
Weeding
  • Prevent weeds with regular mowing and hand-removing tenacious weeds. Relax your stance on weeds, however, and be comfortable with letting some weeds grow in that expanse of green.
  • A slightly wild lawn lets volunteer grasses, wildflowers, herbs, and even wild strawberries grow, adding color and variety to your landscape.
  • Clover grows low to the ground and smells lovely after it’s been cut, and it often stays green after the rest of lawn has turned brown; dandelion greens taste great in a salad (if you’re not applying chemical fertilizers!).
Mowing
  • To keep a healthy lawn, never cut more than one-third off the total grass height. Mow the lawn when the grass is dry and keep the blades sharp to reduce tearing the grass blades (which invites disease).
  • Leave clippings on the lawn to filter down to the soil, decompose, and recycle nutrients back to the roots. The shorter the clippings, the more quickly they will decompose into the soil. Look into the “mulching mowers” that recycle clippings back onto the lawn.

If you're in west Michigan and you’d like to learn more about growing a healthier lawn through organic (chemical-free) maintenance, check out our lawn service options, or contact Good Sweet Earth’s lawn guy Steve Veldheer at Steve@GoodSweetEarth.com.

6 Comments

Enjoy the taste of summer all year long

6/4/2015

0 Comments

 
Picture
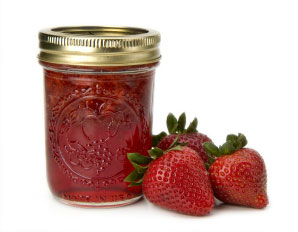
If you share a love for these three things– the home-spun wisdom of The Farmer’s Almanac, fresh strawberry jam, and canning stuff from the garden– then do we have a recipe for you!

First, if you haven’t learned how to can fruits and veggies, this is something you really should try. When you’ve got jars of your harvest stored in your pantry, then you can enjoy the taste of summer well into the dark and cold months of winter.

Second, is there anything finer than a fresh strawberry jam? It is quite possibly the most-enjoyed of all the fruit flavored jams– it’s a step up from the grape jelly we all enjoyed as kids, but it’s not so exotic as to turn off the most finicky of eaters.

And so, from the Farmer’s Alamanc, here is a great recipe for producing your own strawberry jam that can be enjoyed all year long (when you can it properly!):

Ingredients:
4 cups of hulled, mashed strawberries (about 2 pounds fresh strawberries)
4 cups  white sugar
¼ cup  lemon juice

Note: You can buy commercial pectin, though you don’t necessarily need to add any. Pectin occurs naturally in fruit, and is what helps the jam set. Adding liquid pectin can help jam cook more quickly and creates a slightly different texture. If you use it, be sure to follow the accompanying instructions to make sure your jam sets properly.
Equipment:
-Wide-mouth glass jars, bands, and NEW metal lids with rubber seals (you can reuse the jars and bands).
-Large, non-stick pan
-Long-handled wooden spoon
-Non-reactive bowl (glass or plastic)
-Candy thermometer (optional)
-Boiling-water canner or deep pan with a canning rack or basket
-Tongs
-Small spatula
-Clean dish towel

First, sterilize your jars and lids. Wash them in hot, soapy water. Place the jars in a deep pan of boiling water, and boil for 10 minutes. Place the flat metal covers into a pan of simmering water. Leave lids and jars in the water until needed.

Mix the strawberries, sugar, and lemon juice together in the large pan. Don’t fill it to the top, as the mixture could bubble over the edge. Heat on low, stirring until the sugar is dissolved—about 20 minutes. Bring the mix to a boil, stir often, and cook until it reaches the setting temperature of 220 degrees.  If you don’t have a candy thermometer, spoon some jam onto a chilled plate, let it cool, then run your finger through the middle of it. If the jam holds its shape and doesn’t run back together, it’s ready!

Let the jam stand for ten minutes. In the meantime, carefully remove the jars and lids from the hot water with tongs—have a clean towel handy to set them on. Skim excess foam off the top of the jam with a spoon, and then spoon the jam into the jars leaving a quarter inch at the top. Wipe off the rims and run the spatula along the inside wall of the jar to let air bubbles escape. Place the metal lid and then screw on the band.
​

To preserve your jam for up to six months, process it by putting the jars into the boiling-water canner, following any instructions that come with it. You can get one at the supermarket, but if you don’t have one, place a wire rack in a deep pot, bring water to a boil, and boil the jars for ten minutes.  Carefully remove the jars and set on a towel, allowing them to cool overnight. Check the lids to see if they sealed before storing in a cool place.

0 Comments

    Author

    Steve & Corey Veldheer are organic yard & garden specialists in west Michigan.

    Categories

    All
    Animals
    AskTheLawnGuy
    Climate Change
    Current Events
    Farmer's Almanac
    Farming
    Flowers
    Food
    Garden
    History
    Lawn
    Master Gardener
    Michigan
    Microbes
    Off Season
    Pests
    Recipe
    Science
    Soil
    Water
    Weeds
    Worms

    Archives

    July 2022
    June 2022
    April 2022
    January 2022
    September 2020
    June 2020
    March 2020
    January 2020
    August 2019
    July 2019
    June 2019
    May 2019
    April 2019
    March 2019
    January 2019
    November 2018
    July 2018
    May 2018
    April 2018
    March 2018
    February 2018
    January 2018
    December 2017
    October 2017
    March 2017
    February 2017
    December 2016
    November 2016
    October 2016
    August 2016
    July 2016
    June 2016
    May 2016
    April 2016
    March 2016
    February 2016
    January 2016
    October 2015
    September 2015
    August 2015
    June 2015
    May 2015
    April 2015
    March 2015
    August 2014
    July 2014
    March 2014
    November 2013
    September 2013
    August 2013

    RSS Feed

What we offer

Lawn Fertilization
Soil amendments
Yard & garden blog

Who we are

About us/FAQ
Associations & certifications

How you can reach us

Contact
Phone: 616-594-0693
Email: office@GoodSweetEarth.com​
​


© 2022, GOOD SWEET EARTH LLC.
​ALL RIGHTS RESERVED.