 There are so many delicious reasons to grow a garden-- fresh herbs for your soups and dips, fresh lettuce and spinach for salads, fresh berries on ice cream. But man, is there anything more delicious than a fresh tomato off the vine? Juice that squirts out when you cut into it, seeds that drizzle onto your plate, and flesh so tender it melts in your mouth like butter. It doesn't matter how we eat them (sliced on burgers, diced into a pico de gallo, chopped over some pasta), tomatoes offer us the most stark reminder of why growing your own is so much better than buying from a chain grocery store. I threw together a tomato sandwich for lunch today, and it was so good, I had to share it. (There probably aren't too many fertilizer companies around that put recipes on their websites, but THIS is the very reason we got into the fertilizer business in the first place-- to produce the healthiest, most delicious garden bounty this side of Eden.) And this sandwich just looked so pretty and tasted so delicious, I couldn't keep it to myself. Enjoy! Tomato & Onion Open-Faced Bagel Sandwich Ingredients One garden-fresh tomato (grown with Living Worm Compost) One fresh red onion Hummus (not to be confused with humus; we may be soil lovers here, but let's not get carried away!) Olive oil Coarse-ground sea salt, black pepper, chili powder, celery seed Toasted bagel Directions Put a healthy schmear of hummus on both halves of a toasted bagel and drizzle a tablespoon of olive oil over the hummus. Dice up the tomatoes and scoop the flesh, juice and seed onto the bagel. Dice up a couple rings of red onion and sprinkle over the tomatoes. Season to taste with sea salt, pepper, chili powder and celery seed.
0 Comments
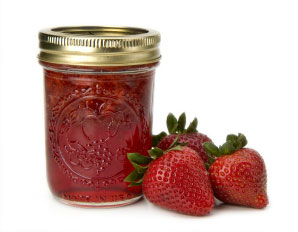
 If you share a love for these three things– the home-spun wisdom of The Farmer’s Almanac, fresh strawberry jam, and canning stuff from the garden– then do we have a recipe for you! First, if you haven’t learned how to can fruits and veggies, this is something you really should try. When you’ve got jars of your harvest stored in your pantry, then you can enjoy the taste of summer well into the dark and cold months of winter. Second, is there anything finer than a fresh strawberry jam? It is quite possibly the most-enjoyed of all the fruit flavored jams– it’s a step up from the grape jelly we all enjoyed as kids, but it’s not so exotic as to turn off the most finicky of eaters. And so, from the Farmer’s Alamanc, here is a great recipe for producing your own strawberry jam that can be enjoyed all year long (when you can it properly!): Ingredients: 4 cups of hulled, mashed strawberries (about 2 pounds fresh strawberries) 4 cups white sugar ¼ cup lemon juice Note: You can buy commercial pectin, though you don’t necessarily need to add any. Pectin occurs naturally in fruit, and is what helps the jam set. Adding liquid pectin can help jam cook more quickly and creates a slightly different texture. If you use it, be sure to follow the accompanying instructions to make sure your jam sets properly. Equipment: -Wide-mouth glass jars, bands, and NEW metal lids with rubber seals (you can reuse the jars and bands). -Large, non-stick pan -Long-handled wooden spoon -Non-reactive bowl (glass or plastic) -Candy thermometer (optional) -Boiling-water canner or deep pan with a canning rack or basket -Tongs -Small spatula -Clean dish towel First, sterilize your jars and lids. Wash them in hot, soapy water. Place the jars in a deep pan of boiling water, and boil for 10 minutes. Place the flat metal covers into a pan of simmering water. Leave lids and jars in the water until needed. Mix the strawberries, sugar, and lemon juice together in the large pan. Don’t fill it to the top, as the mixture could bubble over the edge. Heat on low, stirring until the sugar is dissolved—about 20 minutes. Bring the mix to a boil, stir often, and cook until it reaches the setting temperature of 220 degrees. If you don’t have a candy thermometer, spoon some jam onto a chilled plate, let it cool, then run your finger through the middle of it. If the jam holds its shape and doesn’t run back together, it’s ready! Let the jam stand for ten minutes. In the meantime, carefully remove the jars and lids from the hot water with tongs—have a clean towel handy to set them on. Skim excess foam off the top of the jam with a spoon, and then spoon the jam into the jars leaving a quarter inch at the top. Wipe off the rims and run the spatula along the inside wall of the jar to let air bubbles escape. Place the metal lid and then screw on the band. To preserve your jam for up to six months, process it by putting the jars into the boiling-water canner, following any instructions that come with it. You can get one at the supermarket, but if you don’t have one, place a wire rack in a deep pot, bring water to a boil, and boil the jars for ten minutes. Carefully remove the jars and set on a towel, allowing them to cool overnight. Check the lids to see if they sealed before storing in a cool place. |
